Strategy Setup
Now you’re ready to customize your PowerFib Strategy. We’ll walk you through the settings and you’ll see just how much power is at your fingertips.
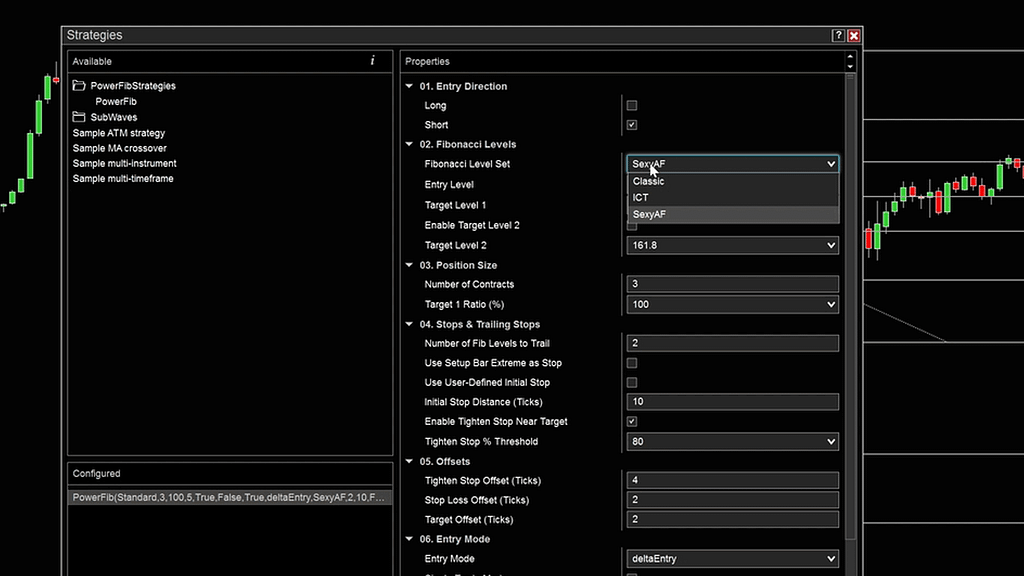
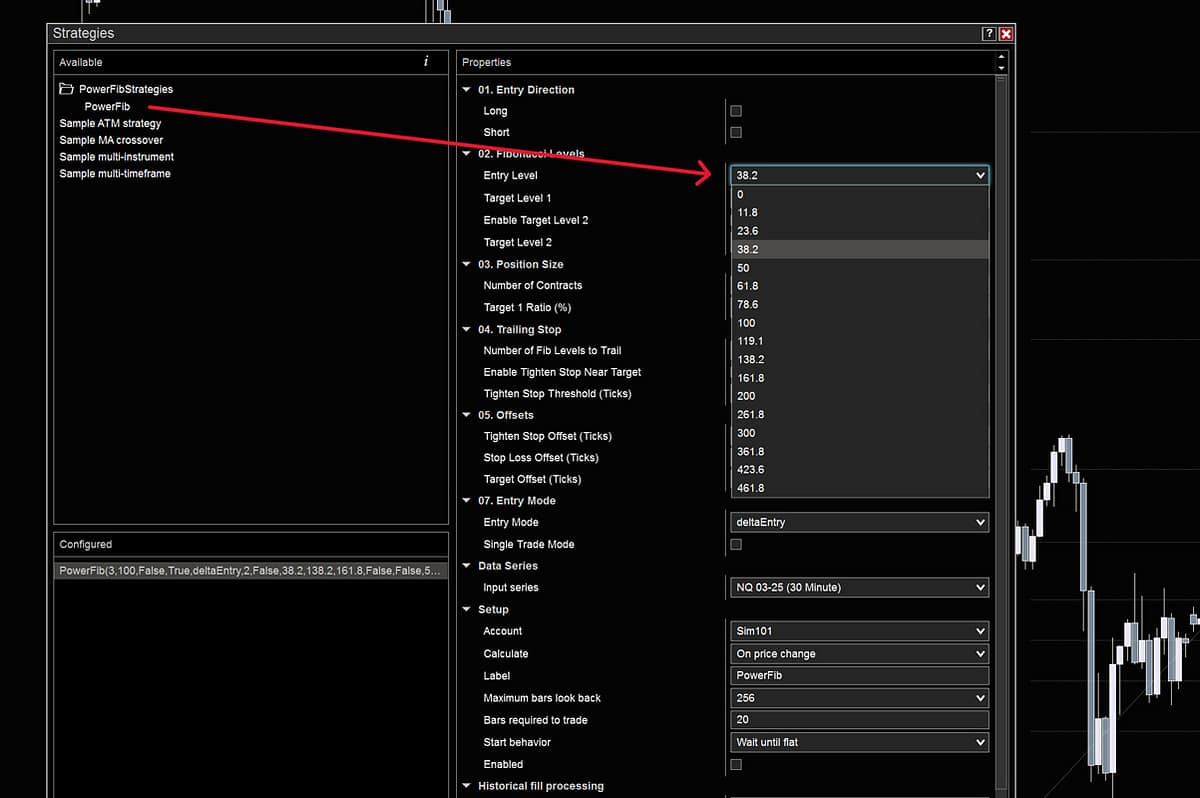
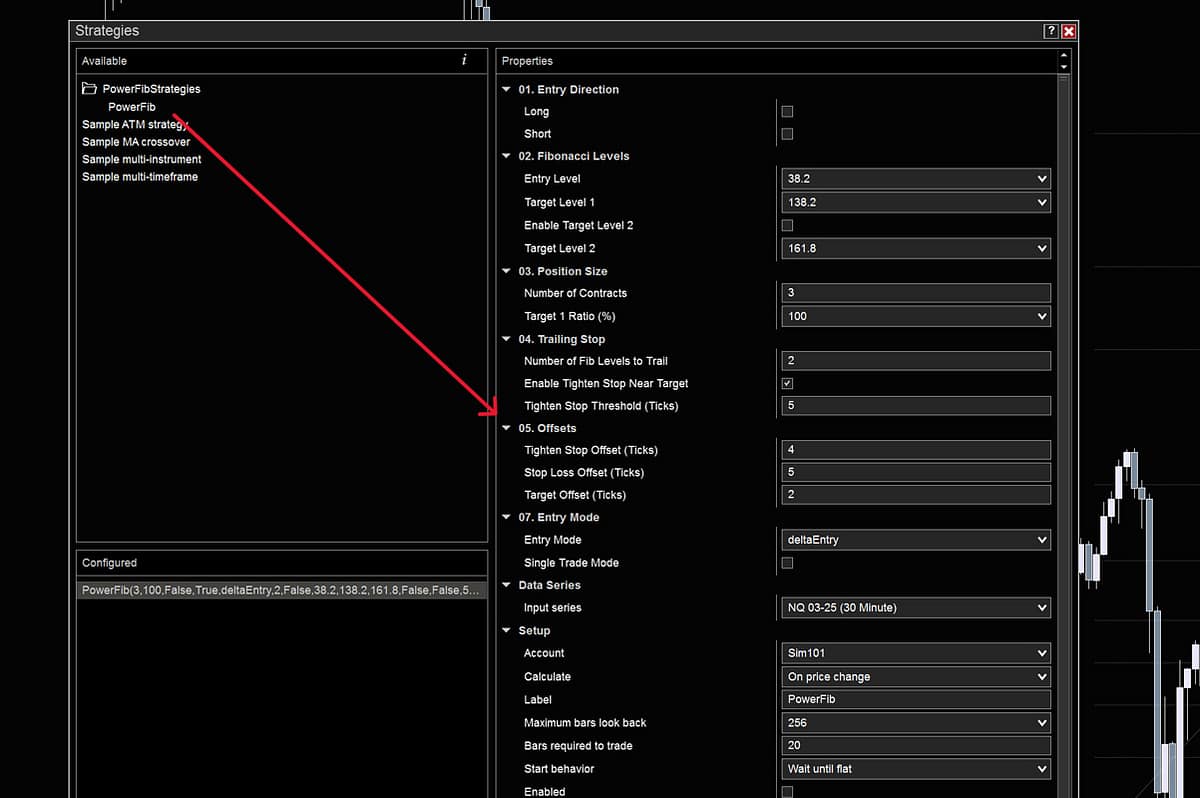
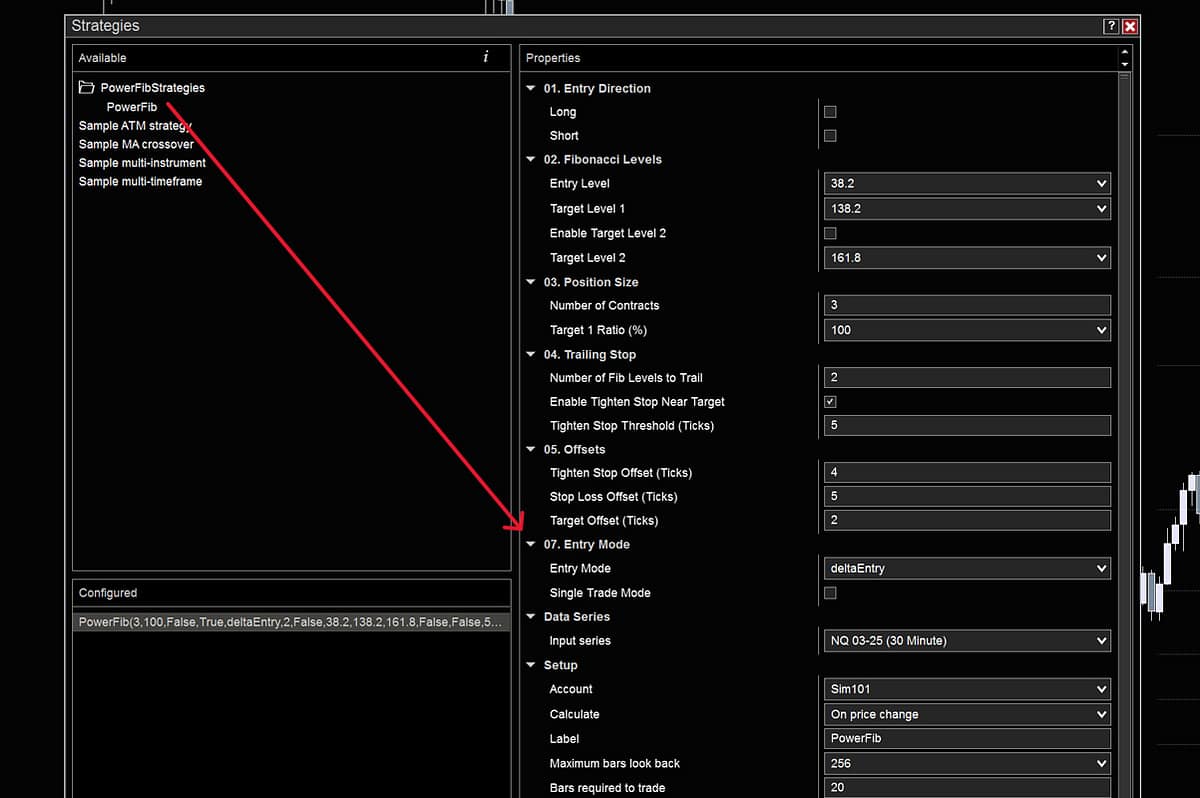
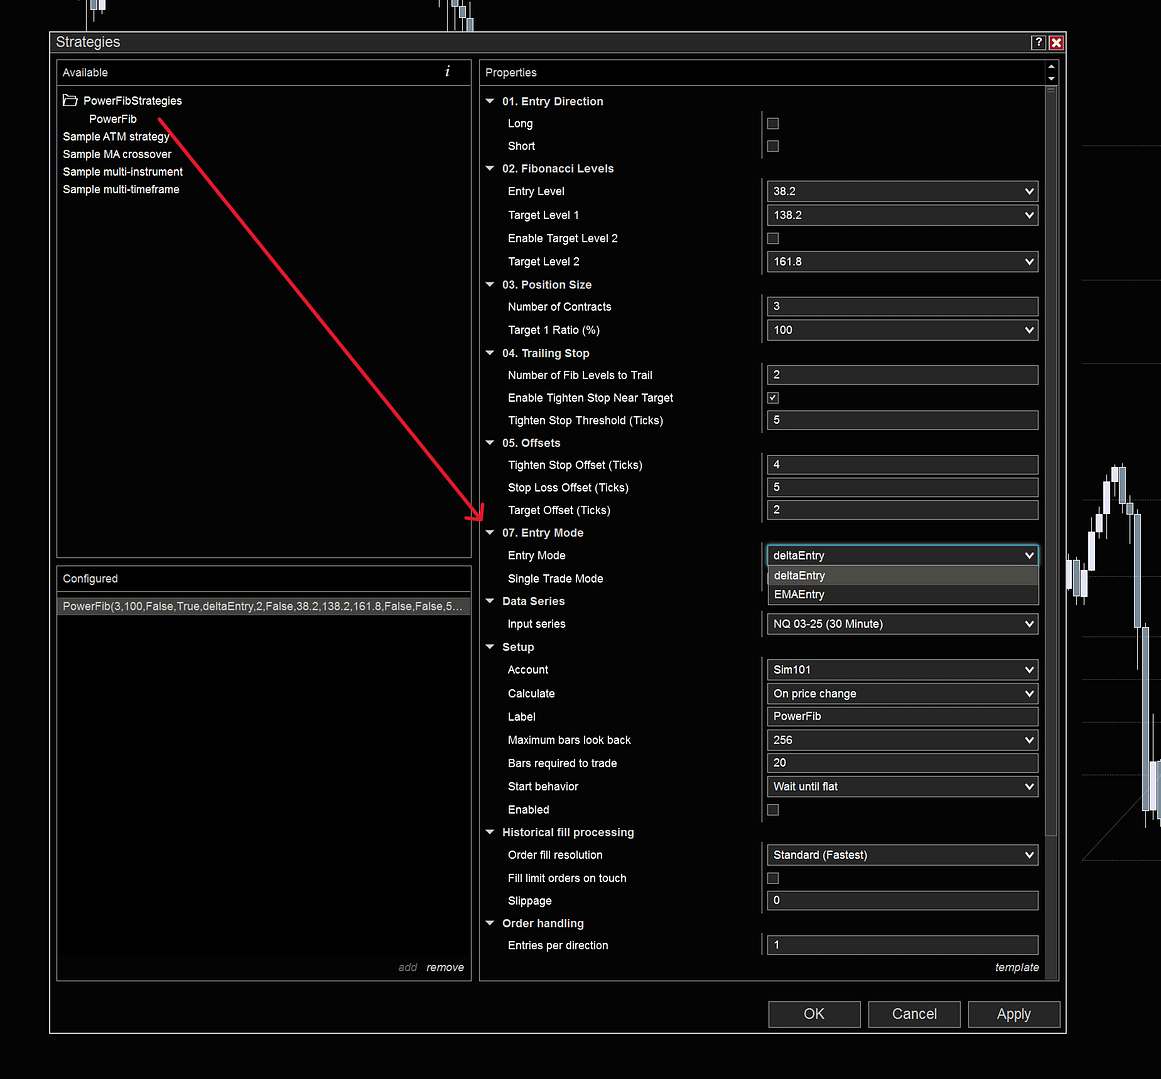
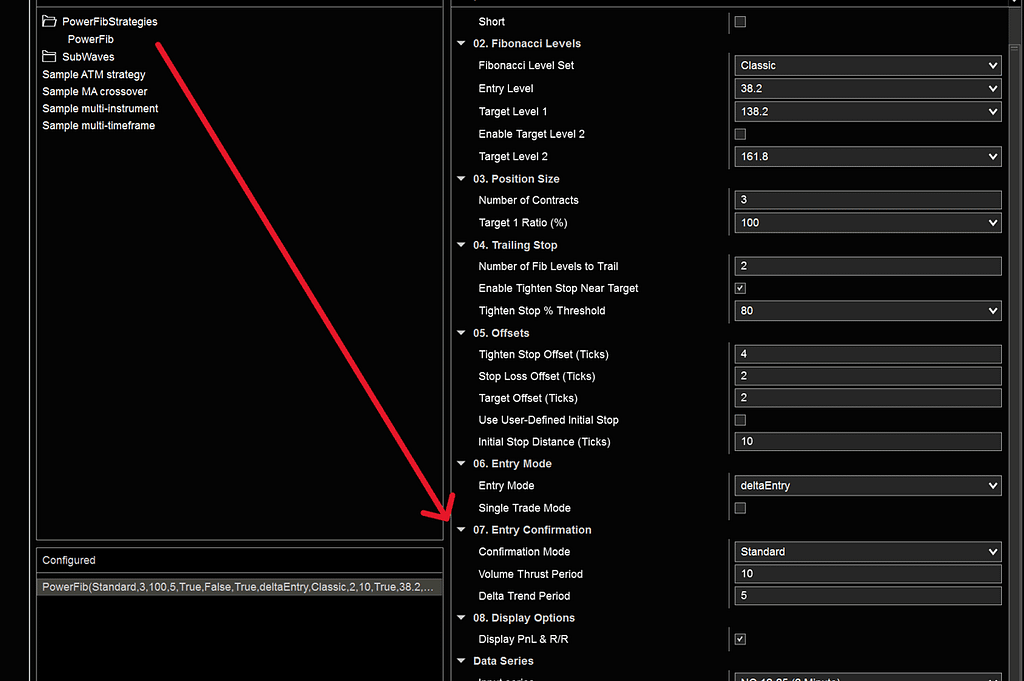
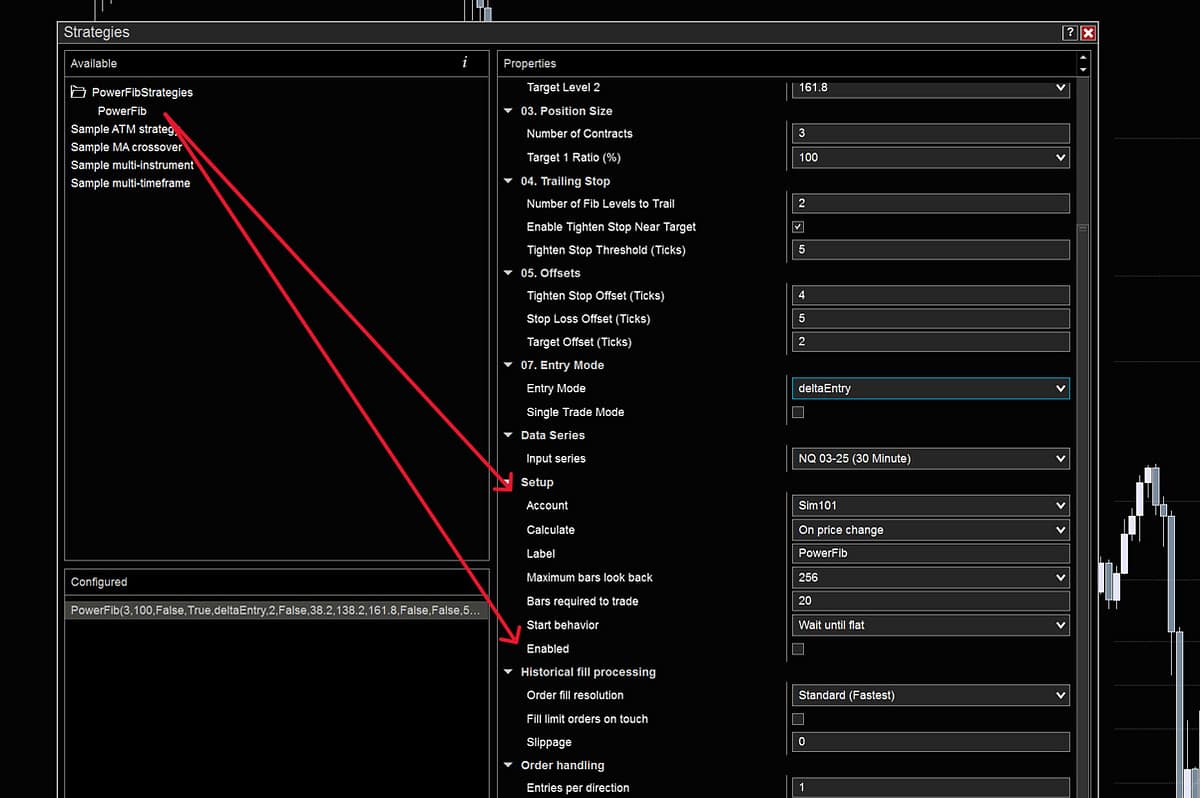
Right-Click on the chart window and select ‘Strategies’. The strategies window below will open on your chart and you’ll find the PowerFib Strategies folder. Double-Click to open, double-click on ‘PowerFib’ and it will load in the Configuration Window and all the user-defined variables will be listed on the right-hand side.
01. Entry Direction
Simple enough. Long or Short. Both boxes are left unchecked by default, so that you must choose your desired direction.
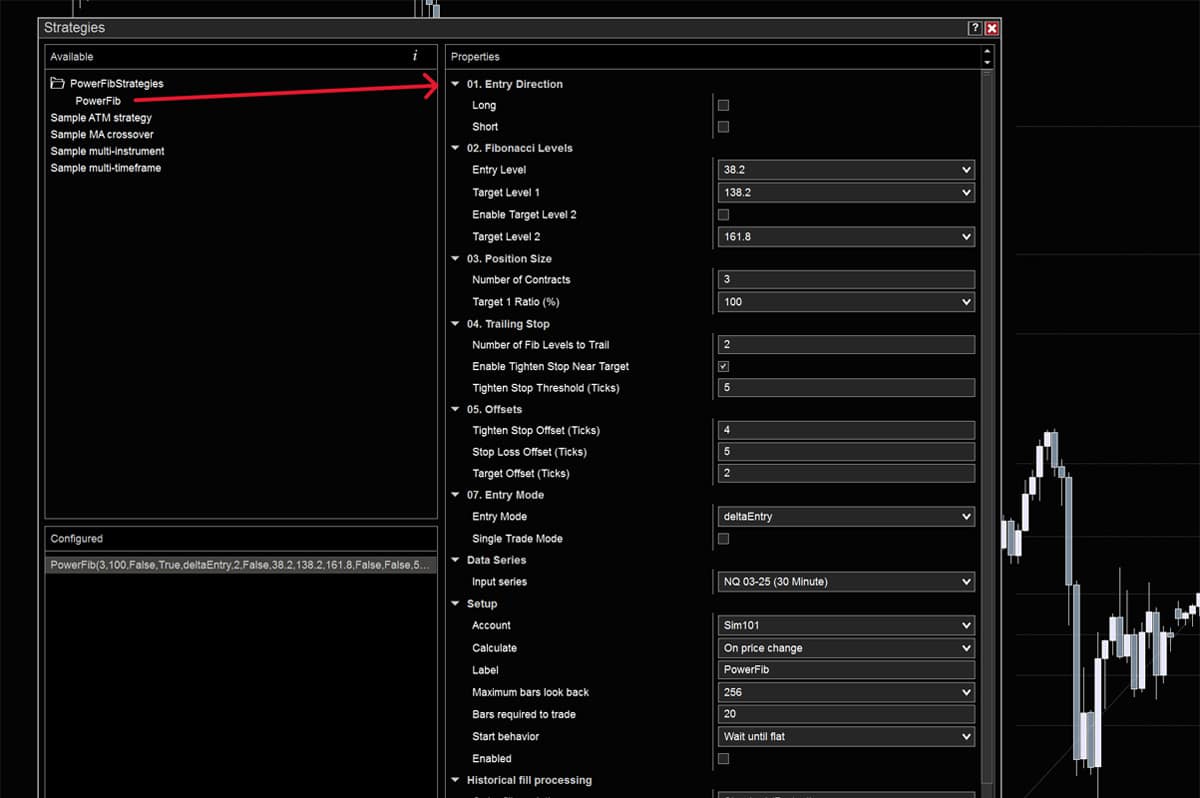
02. Fibonacci Levels
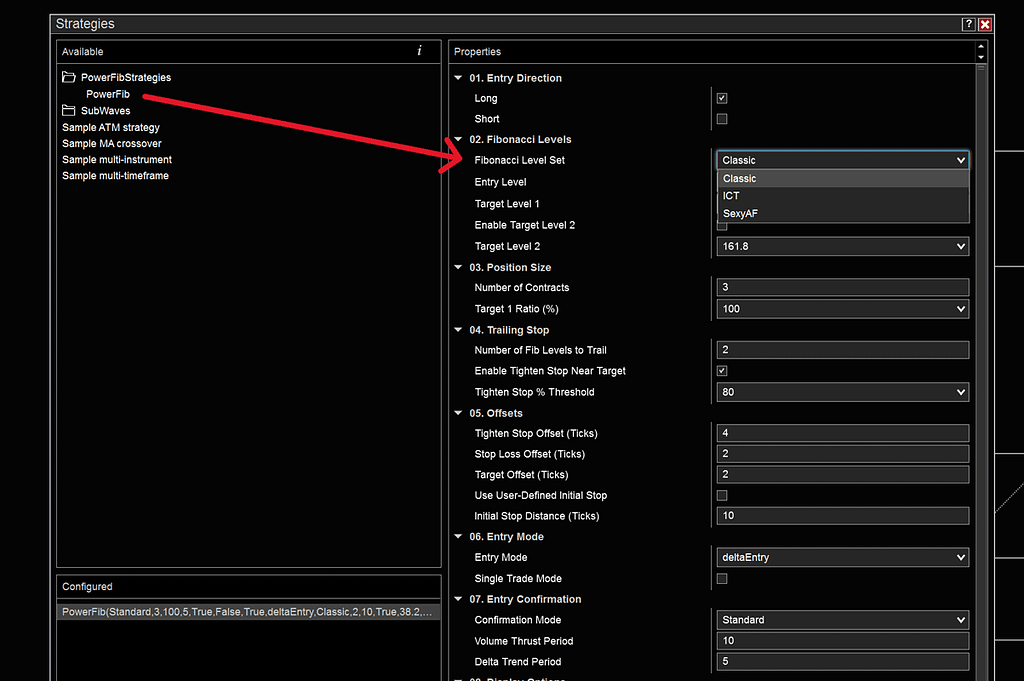
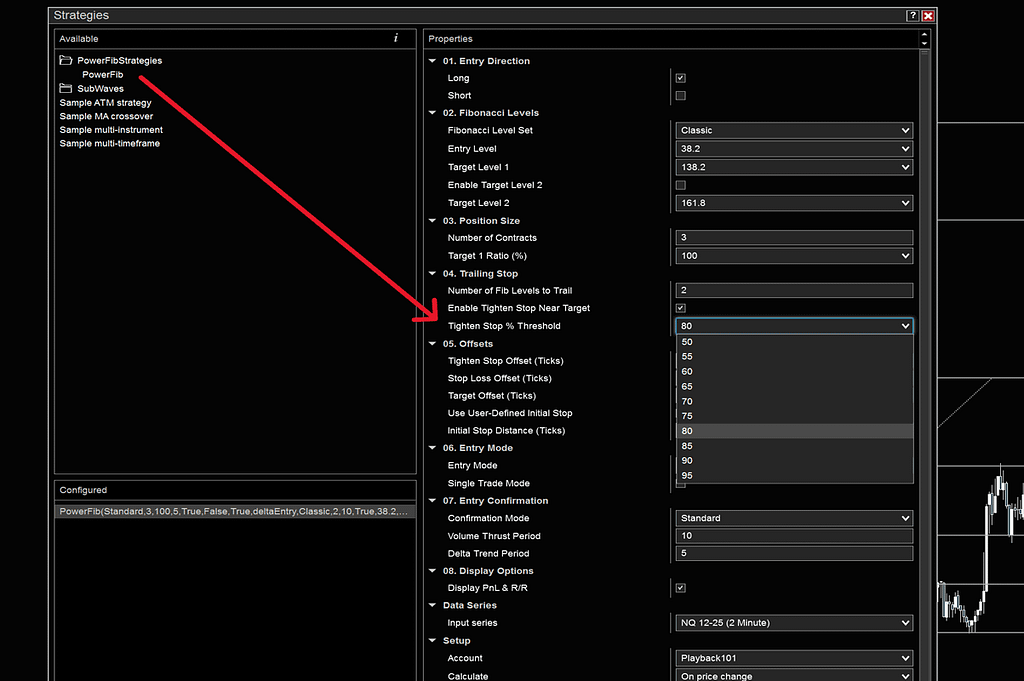
Fibonacci Level Set:
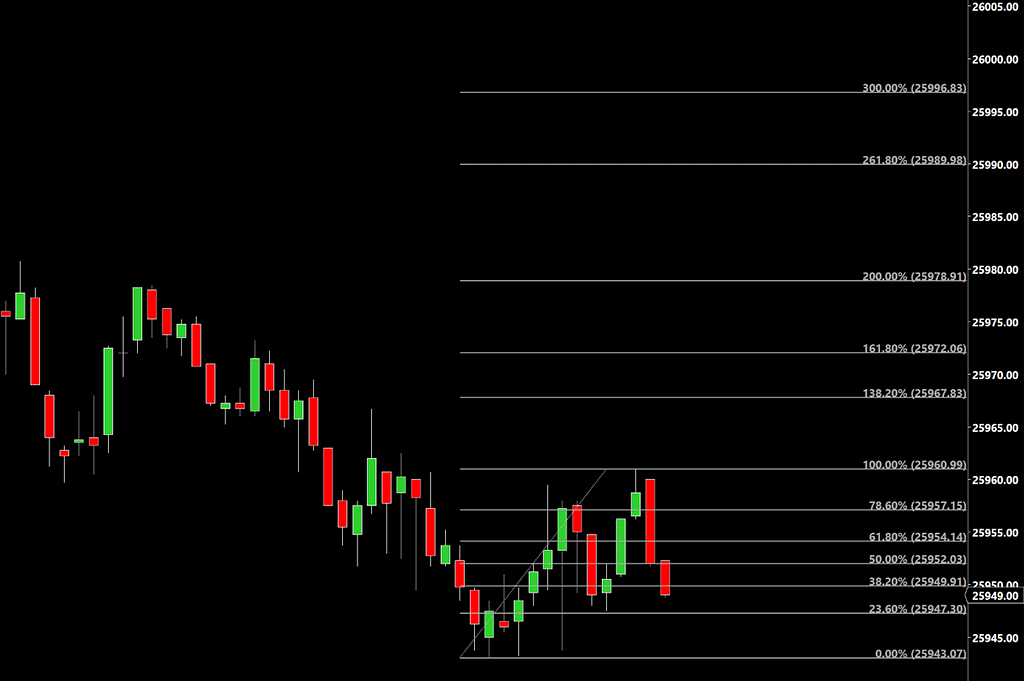
We have 3 sets of Fibonacci Templates to choose from: Classic, ICT (Inner Circle Trader Methodology) and Sexy AF (Classic + ‘Half-Back’ levels).
IMPORTANT: When changing the Fib Level Set, use the dropdown menu to change to the set of your choice; you MUST hit the ‘OK’ button to close the strategy properties window and properly load the new Fib Level Set’s unique levels.
Reopen the strategy and your chosen levels will now be loaded in the ‘Entry’ and ‘Target’ windows.
Classic
The ‘Traditional’ Fibonacci levels, for those Purists out there.
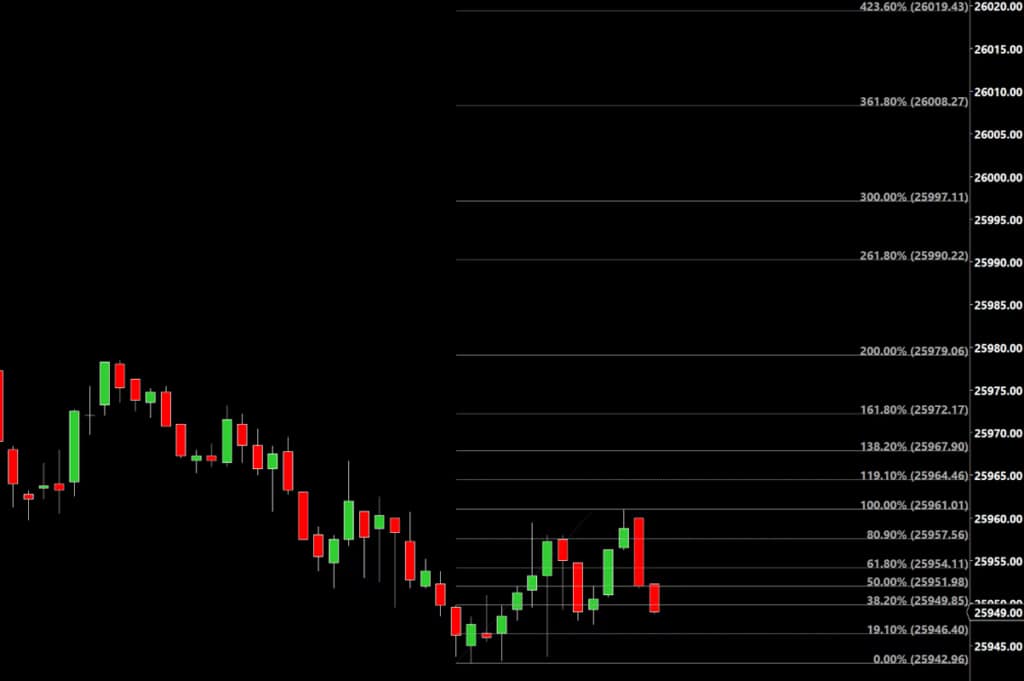
0.0, 23.6, 38.2, 50.0, 61.8, 78.6, 100.0, 138.2, 161.8, 200.0, 261.8, 300, 361.8, 423.6, 461.8
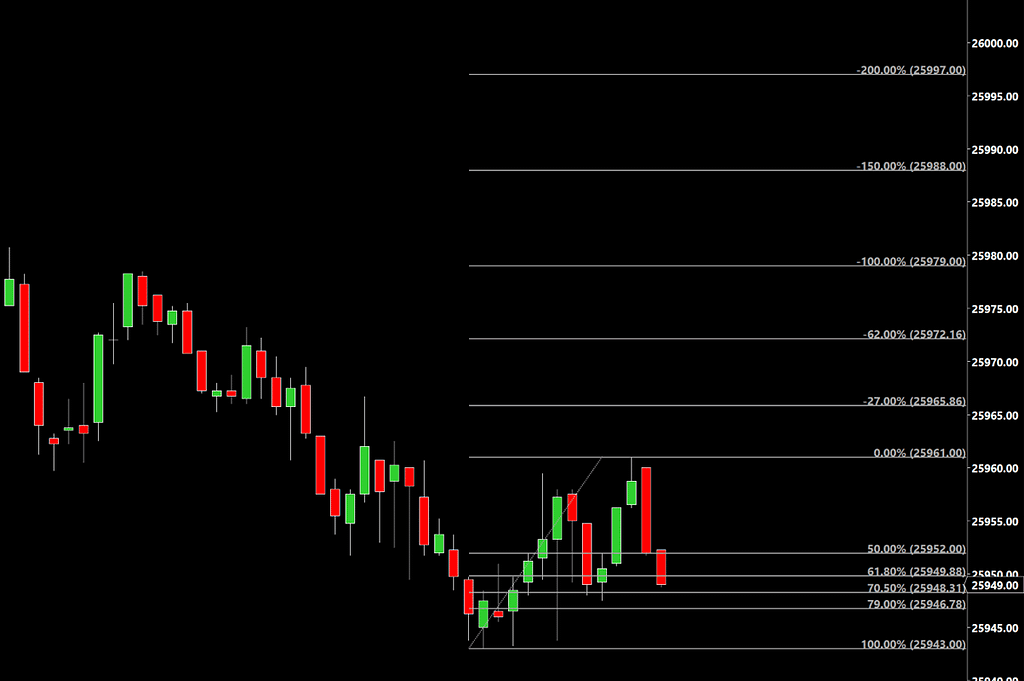
ICT Fib Levels
For those trading ICT models, these are the most commonly used levels.
0.0, 50.0, 61.8, 70.5, 79.0, 100.0, -27.0, -62.0, -100.0, -150.0, -200.0, -250.0, -300.0
Sexy AF Fib Levels
We developed these by focusing on the ‘Halfback’ levels of 19.1, 80.9 and 119.1. They work especially well in the fast paced Futures Markets.
0.0, 19.1, 38.2, 50.0, 61.8, 80.9, 100.0, 119.1, 138.2, 161.8, 200.0, 261.8, 300.0, 361.8, 423.6, 461.8
Entry Level:
Choose any level on the chart. Maybe you have a favorite, often-hit level, maybe you use different levels with different patterns. You have full flexibility.
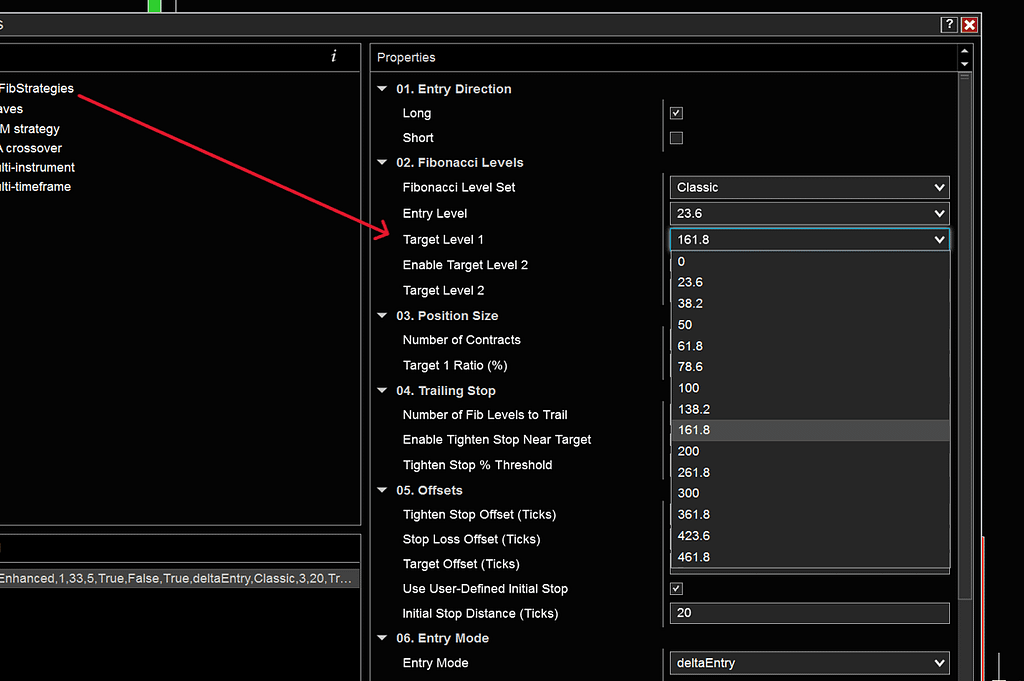
Target Level 1:
Your primary target. Choose any level on the chart, however close or far away you want. Scalp, swing, level to level, however you want to play it. It’s your system. Unless you enable Target Level 2 below, all your contracts are targeting this level.
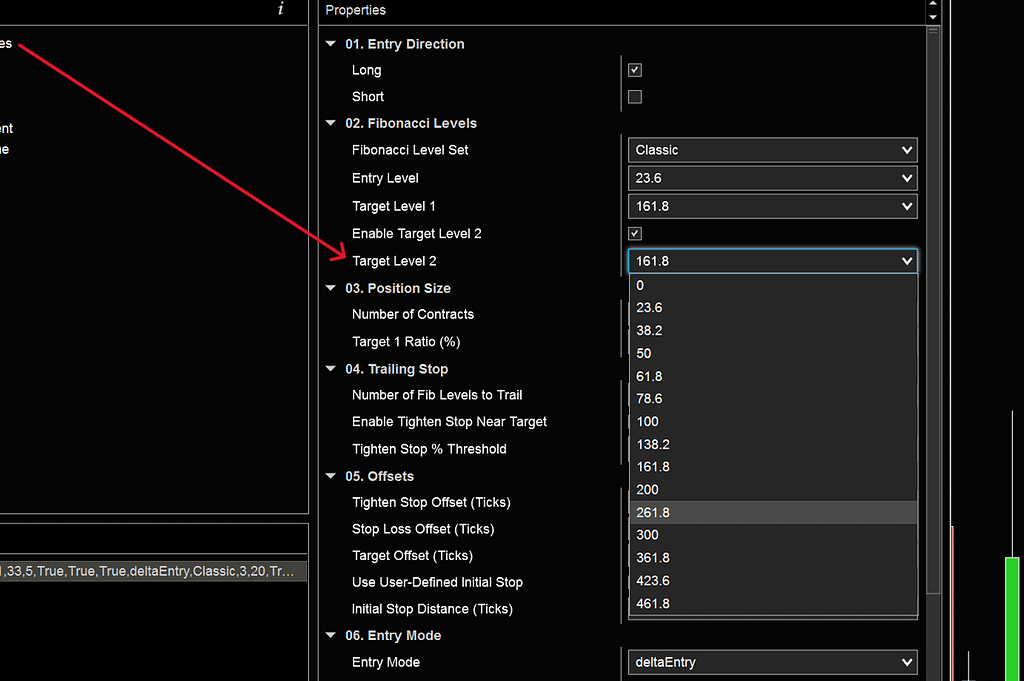
Enable Target Level 2:
If you want a secondary target level, tick this box to enable it. Like to leave a runner on after your primary target is hit? This is where you do it.
Target Level 2:
Your secondary target. Choose well young Jedi, the world is yours. This will reflect all the valid levels of the Fib Level Set you chose above.
3. Position Size
Number of Contracts:
Total number of contracts you are going to trade. Default set to 3.
Target 1 Ratio (%):
The percentage of your total number of contracts that are assigned to Target Level 1, your primary target. Default set to 100%. The balance is assigned to your secondary target, Target Level 2. You can choose from 25%, 33%, 50%, 67%, 75% or 100% (default setting).
If you like to leave 1/3 on as a runner for your secondary target, you’d choose 67% as your Target 1 Ratio; if you want to take 1/3 off at your first target level and leave 2/3 on for the second target level, you’d choose 33%. We use a rounding calculation so whatever your Total Number of Contracts, it will spilt correctly between the two target levels, if enabled.
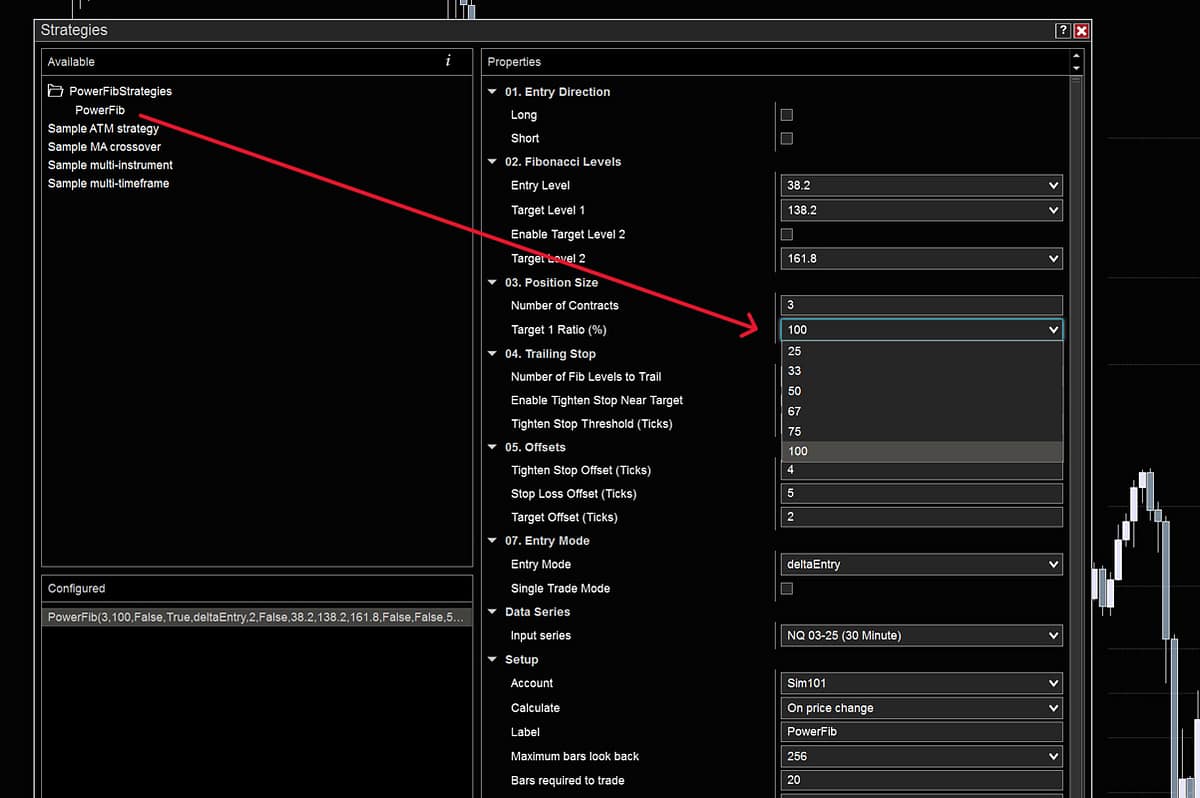
4. Trailing Stop
This section is the special sauce, where the magic happens, the reason why you’re here. Keep your stops moving naturally, relative to Market Movements, letting your potential profit stay protected as it plays out. Consistently. Reliably. Robustly.
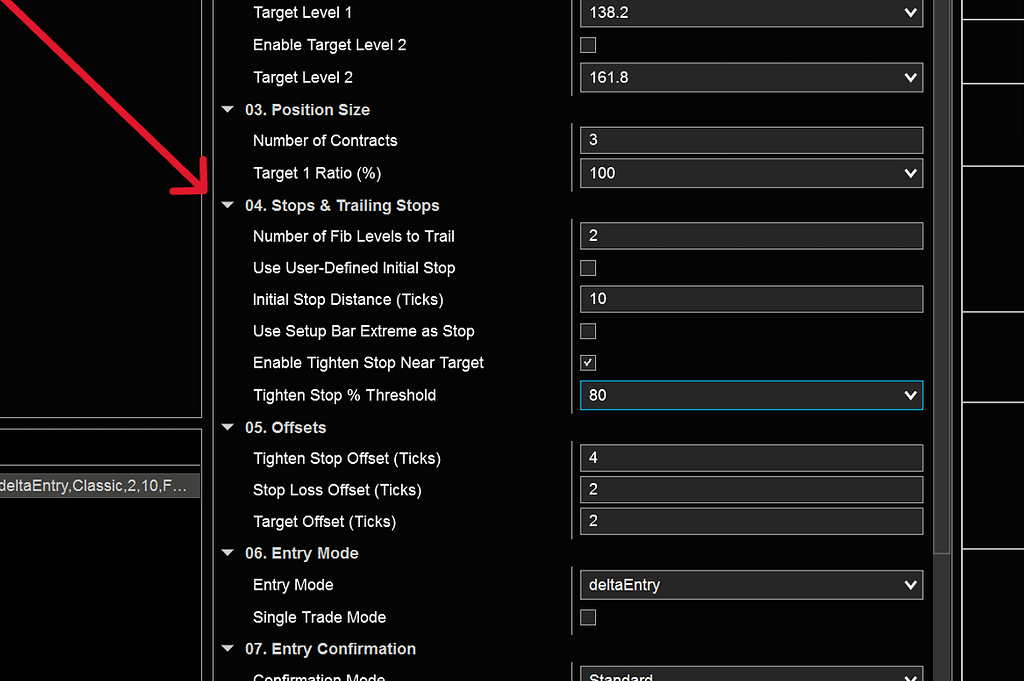
Number of Fib Levels to Trail:
Choose the number of PowerFib levels to trail behind price. As a rule-of-thumb: 1 level behind can be kind of tight; 2 can be just about right, for trading inside the the retracement range; 3 or more is consistent with ‘swinging’ for targeting extensions outside of the range (100 – 461.8), from entries inside the range (0-100) . It’s entirely up to you and your trading style.
Use User-Defined Initial Stop
If you want to set absolute initial stops, in Ticks. Use case: you want to really cut down your risk. You want to enter Long at the 38.2 level and trail by 2 Fib levels. This would place your stop at the 0.0 level…quite a bit in some instruments. Choose how many ticks behind the entry level you want stop placed and that’s exactly where it’ll be when your trade enters (automatically or via manual button).
Use Setup Bar Extreme as Stop
This is a Price Action classic and another great way to cut your risk; a lot of good trades quickly work and won’t see your entry spot again. If price does come back, you’re not letting it move again for very much or very long.
Enable Tighten Stop Near Target:
When you want to tighten up as you get close to target and lock in max profits. This will vary by instrument and personal preference . You’ll set the Threshold (in % of profit met i.e. 80%) which will trigger the Tighten Stop function, taking over from the Trailing Stop function. This works independently for each target level and won’t interfere with the other position (if Target Level 2 enabled).
Tighten Stop Threshold (%):
Set in Percentage terms (%), from 55 – 95. Default is 80%, so when the distance from your Entry Price to Target (and your Profit) reaches 80% of the way there, the Tighten Stop function is triggered and set n-number of ticks behind Price, where n-number of ticks is the number you choose in Tighten Stop Offset (below). We find that having the Tighten Stop function triggered in Percentage terms versus Ticks allows for much more intuitive trade management.
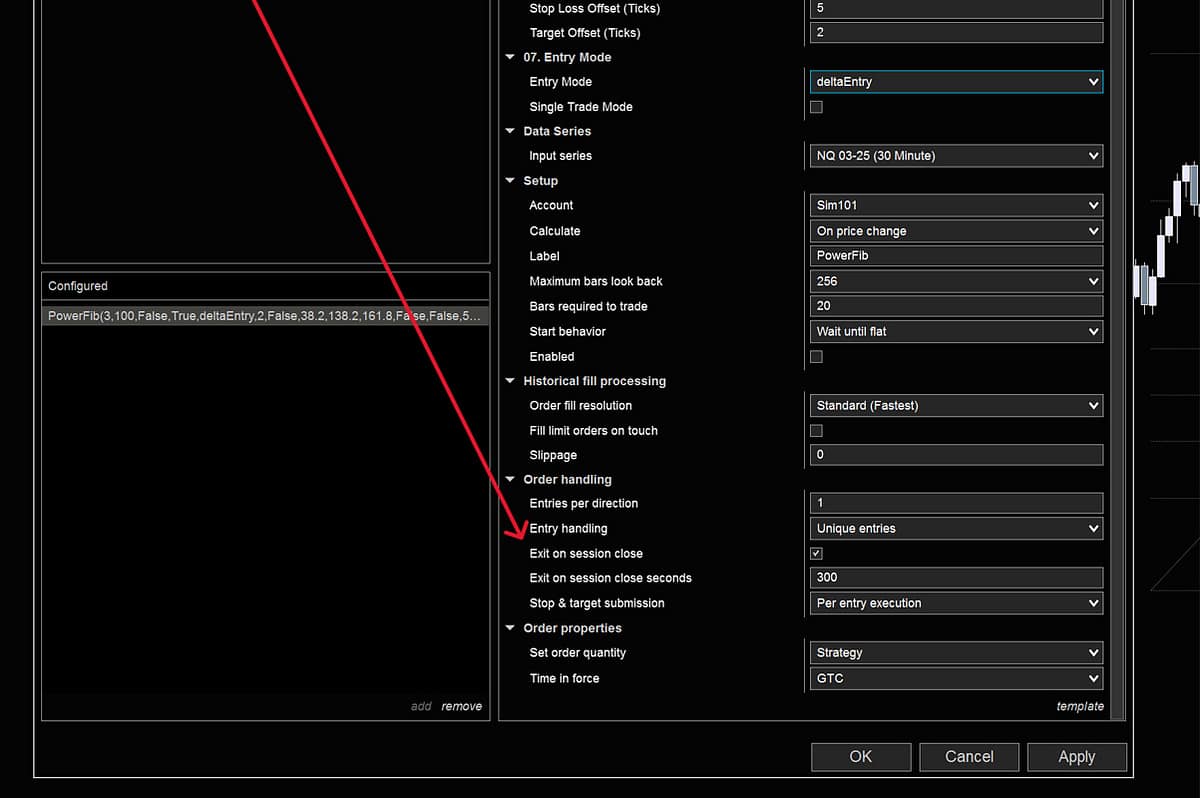
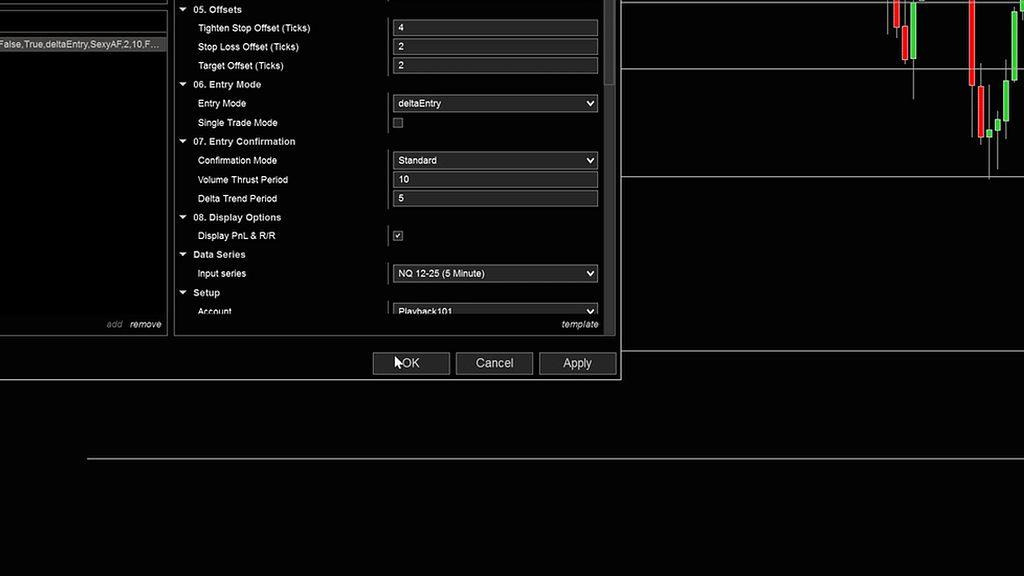
5. Offsets
Tighten Stop Offset:
How many ticks your stop will move behind current Price. Once your Tighten Stop Threshold level is hit, your stop will move to whatever tick value you’ve chosen here and ratchet tick-for-tick behind price as it marches towards target, never moving backwards, always protecting your profits.
Stop Loss Offset:
How many ticks your stops will be above or below the fib level that is the current stop level. If you’ve entered at the 61.8 level and have chosen “2” in the Number of Fib Levels to Trail, your initial stop will begin at the 38.2 level (2 levels behind). 0 will keep the stop at the exact price of each fib level as it trails, 2 ticks would keep it to ticks behind fib level. A negative value would have your stops set above the fib level.
Target Offset:
How many ticks above or below the target fib level where the exit order will be placed. Some people have their favorite number…
6. Entry Mode
Delta Entry:
If you have a NinjaTrader Lifetime license and take advantage of Order Flow +, this will enter a position when:
A.) Price moves above/below your Entry Level (Candle Closes)
AND
B) Cumulative Delta Close is greater than the previous bar (long position) or Cumulative Delta Close is less than the previous bar (short position). We’re looking for momentum in the desired direction.
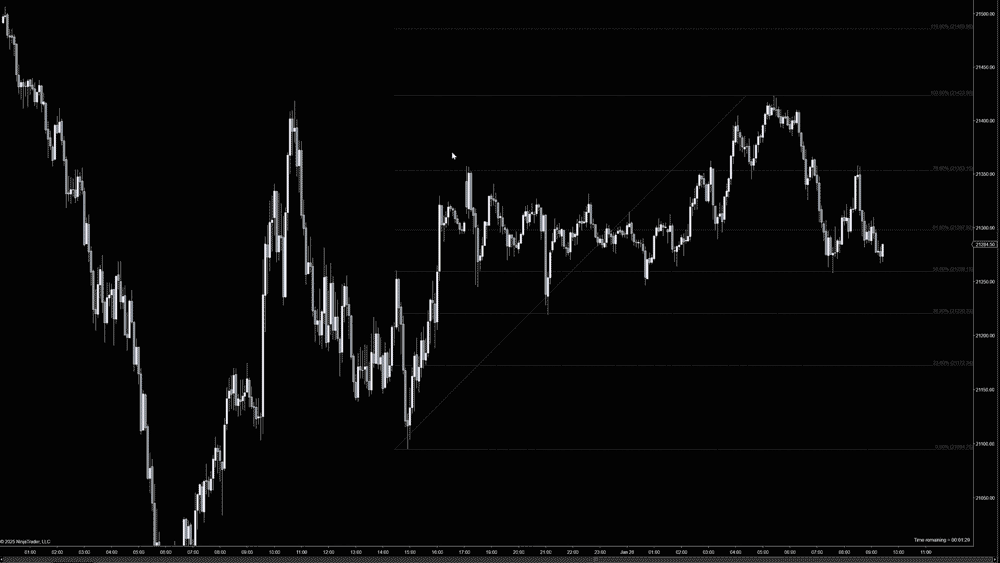
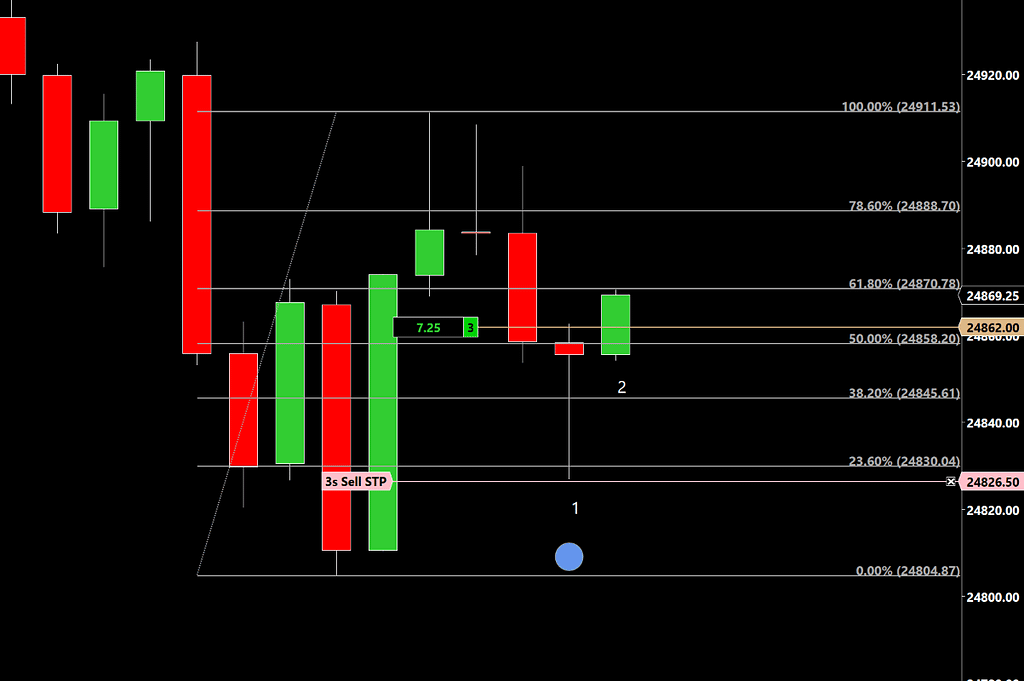
Long and short Delta Entries are shown below. In the long entry on the left, the ‘Setup Bar’ (#1) low dips below the 23.6 entry level before being quickly rejected and closing above, at which time a blue dot is painted as a visual reference that Powerfib is now looking for Delta Momentum conditions to turn true on the ‘Trigger Bar’ (#2). If they don’t, no trade is triggered. If they do, a trade is immediately entered at machine speeds.
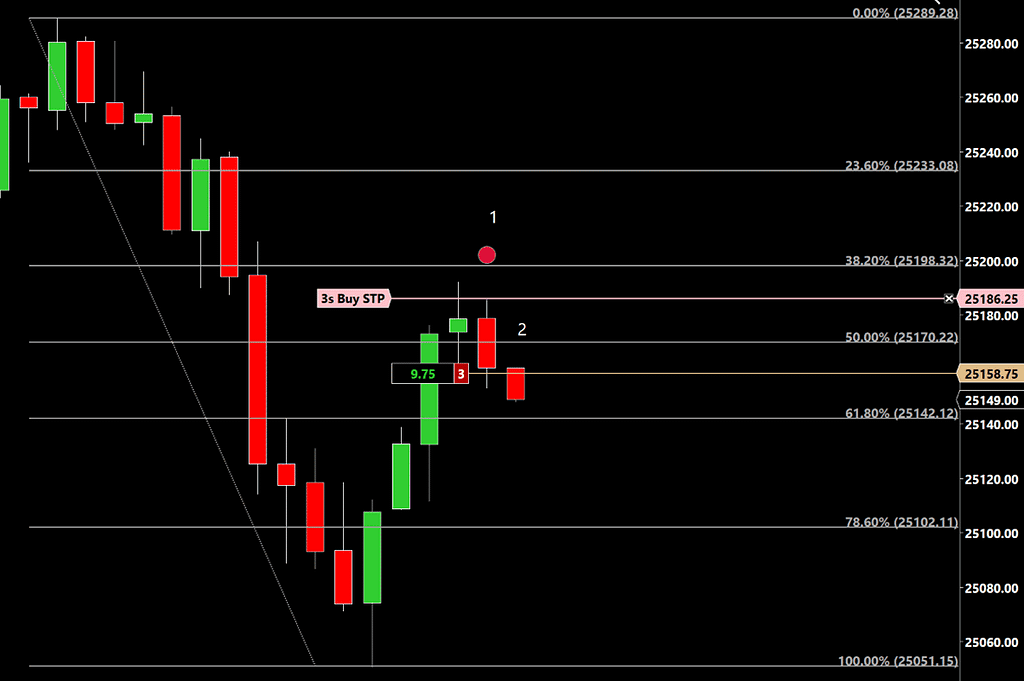
In the short Delta Entry trade on the right, the ‘Setup Bar’ (#1) has a red dot printed above once it has been rejected and closed back below the entry level. It quickly makes entry during the ‘Trigger Bar’ (#2) as the Delta Momentum begins dropping.
Trades will only be entered on the Trigger Bar (#2). Price must remain in front of the entry level; no trade will ever be entered if price moves back beyond the entry level.
On both trades, the ‘Use Setup Bar Extreme Stop’ is used, placing the protective stop at the low of the setup bar for the long position, and at the setup bars’ high in the short trade.
EMA Entry:
For those using the free version of NinjaTrader, PowerFib offers a EMA entry mode using short term EMA ‘crossovers’ to serve as a proxy for a rotation in Cumulative Delta. This gives you an added layer of confirmation for entries beyond the basic Price Action “close above/close below’ support or resistance.
Single Trade Mode:
When enabled, this will only allow ONE single entry and then the Strategy will disable itself once that position is closed–when either target or stop orders are hit, or if manually closed. This prevents future entries if the entry level is hit and the conditions are met.
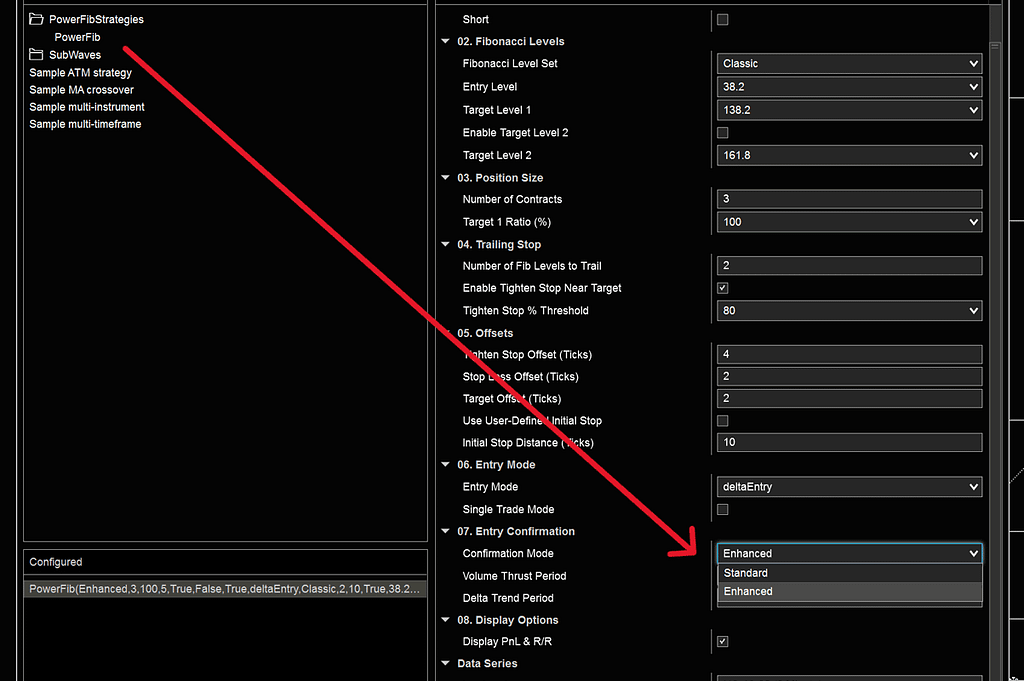
07. Entry Confirmation
Enhanced
Default setting. We mined (and saved to database) thousands of trades with PowerFib. We’ve leveraged the most powerful findings from our Machine Learning models as conditions to filter your trades. This Data-Driven approach, focusing on Order Flow signals in your entry window, give you added confirmation and confidence in your automated entries. You can fine tune these Volume Thrust and Delta Trend settings to fit each individual instrument and your own requirements.
Standard
This uses classic Price Action (move below, rejection, then close above Entry Level) combined with rich Order Flow data including Cumulative Delta, to create a simple and powerful confirmation signal. This setting will execute more often than enhanced mode and can be thought of as more aggressive.
Manual Entry/Exit Buttons
PowerFib’s manual entry buttons give you complete control over your strategy, making it a true semi-automated strategy. Fine tune entries and exits according to your methods or market volatility.
Entry and Exit orders are submitted as Market Orders to ensure fills.
“B/E” = Move position to Breakeven from any point at any time when your protective stop is BEHIND your Average Entry Price.
“T/S” = Manually enable Tighten Stop function from any point if it has not yet triggered. This is great when you’ve decided that price is reversing and might not hit target; give your trade the room you intended and let math dictate when you get out…not a sudden emotion-driven exit.

Risk/Reward Display

PowerFib automatically calculates the trades’ Risk/Reward ratio (Entry Level to Target Level = Reward | Initial Stop to Entry Level = Risk) and displays as color coded for quick visual reference: less than 1.0 in red, 1.0 – 2.0 in yellow and 2.0 and above displays green . R/R in number of ticks is displayed directly below.


Enable Strategy
This must be checked and enabled for the strategy to run. Tick the box to enable and hit OK.
You’ll know the strategy is enabled and ready to rock when the status light is green. Good to go. If the light ever shows yellow, simply right-click your chart and choose “Reload NinjaScript”. Occasionally NinjaTrader will encounter corrupted historical data in Market Replay or Live Data and will need to be reloaded.
Exit on Session Close
This is enabled by default and will close any strategy positions at the Close of Regular Trading Hours (5PM CST), minus however many seconds are entered below. Default is 300 seconds (5 minutes). Some Brokers and Prop Trading outfits require positions closed a certain amount of minutes before Session Close. Know what your broker or prop firm requires.